
Understanding the Pathfinder Palette in Adobe Illustrator
Let's take a look at the Pathfinder palette in Adobe Illustrator
By default, the Pathfinder palette also includes alignment and transformation tools.
Let's start with the alignment tools.
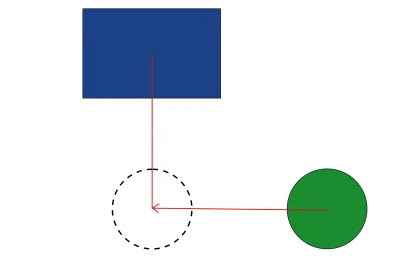
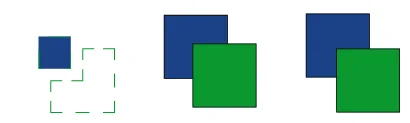
Let's say you have two shapes on your artboard, no matter which ones. Your task is to place them on the same vertical line.
In the article "Analysis of the Shaper tool and Shape Builder Tool in Adobe Illustrator" we looked at what smart guides are and how they help us position objects relative to each other and relative to the artboard, and now let's look at the alignment tools.
To place these two figures on the same vertical line, you need to select one of them, let's say we select a circle, then hold down the SHIFT key and add a square to the selection, then release the SHIFT key and click on the square again. When the square lights up with a bold blue outline, we begin the alignment process.
To do this, in the dynamic panel or in the Align palette, look for the horizontal alignment by center command. Thus, we placed one object under the other exactly on the same vertical line.
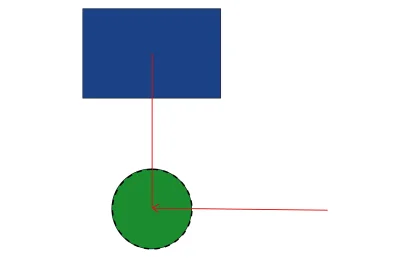
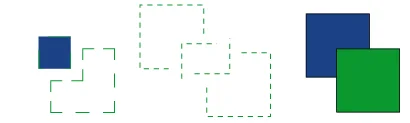
Let's try to do the same with a square. The result will be identical. Now let's imagine a situation where you need to place these objects on the same horizontal line.
Just like last time, select a circle or square, hold down the SHIFT key, add the object to the selection that we would like to align, remove the SHIFT key, click on the square again, go to the dynamic panel or the Align palette and select the vertical alignment command by the center. Done.
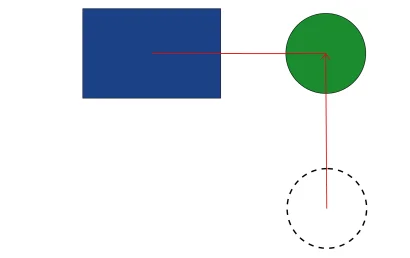
If you have, for example, only two elements on your artboard, you can simplify the selection process and select both objects at once with a rectangular lasso, click on the shape you would like to align, and align it not by the center, but by the top edge, for example.
Previous time, the objects were aligned strictly by their middles, and now they will be aligned by their top edge.
You can also align an object relative to the artboard; for this, the Align to Artboard function must be active.
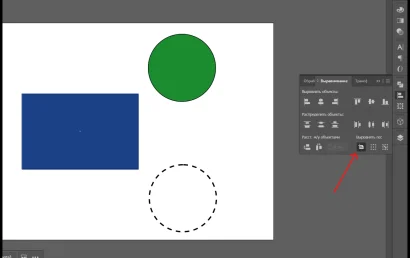
Let's select the square and click on the alignment tools. Everything is very clear here, there is no point in analyzing all the alignment tools separately.
Let's move on to Transform.
In the first two cells, you can set a value to change the position of the object in space. In the next two cells, you can change the width and height of the object. Next comes the change in the rotation angle, as well as the ability to make a bevel.
Below, in the cells you can also work with the width and height of the object. The Rectangle Angle function actually duplicates the Rotate function. Next comes the block responsible for rounding the corners.
You can round corners here, in the dynamic panel, and directly on the object itself using special manipulators.
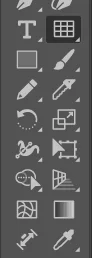
Now let's move on to the most important tool - Pathfinder.
The Pathfinder tool is another fundamental tool for creating shapes. Note the abundance of possibilities in this palette.
Let's deal with each of them in turn, having previously drawn intersecting objects.

In order to do anything with the shapes, you need to select them with the Selection Tool. Stretch the lasso and select the first pair of objects.
The first function combines the objects into one. If the objects had any colors, the final shape will acquire the color of the object that was on top.
Let's roll back and swap them. In order to move the object down, you need to use the keyboard shortcut Shift-Ctrl-left bracket or use the Object-Arrange-Send to Back command.
To move the object up, use the Object Arrange-Bring to Front command.
So, let's place the blue square in the foreground and repeat the action. As you can see, the created figure acquired the color of the object that was in the foreground.

The Minus Front command speaks for itself. It cuts out the object that was located in the foreground, including the small area intersecting with the background object.

The Intersect command will leave the shape that was formed at the intersection of our two objects as a new figure. And these objects themselves will simply be deleted.

The Exclude command will do the exact opposite. It will delete the shape at the intersection, leaving a void.

The Divide command will cut objects along the intersection lines, but to separate them, use the Ctrl-Shift-G ungroup command.

If you want to group some shapes, use the keyboard shortcut Ctrl-G. Or go to the Object menu and select the Group command. After that, by selecting and moving one of the objects in the group, the entire group will move.
The Trim command will trim the objects so that the element at the intersection will go away, the upper element will remain unchanged, and the lower one will be trimmed depending on how you overlapped it with the upper element. In this case, it does not matter at all which element is in the foreground and which element is in the background. In both cases, the Trim command will work the same way.

The Merge command has the same function as Trim at first glance, but it is not that simple. For example, if you have objects of different colors, and one of them has a stroke, then the stroke will be removed, and the objects will be trimmed in the same way as the Trim command does.
However, if your objects are the same color, then the stroke will be removed, and the objects will be combined into one solid element.
And finally, the last three commands.
The Crop command will cut off the bottom object, uniting the shapes at the intersection with the same object that is above. If you separate these shapes with the keyboard shortcut Ctrl-Shift-G, you can separate part of the outline of the resulting shape. The outline of this shape will lose its fill color.
The Outline command will remove the fill color of the objects and cut their outlines at the intersections, after which you will get a number of broken curves.
And finally, the Minus Back command. It will do the same as the
MinusFront command, only in reverse. It will cut out the object that is in the background, and also cut out the area of their intersection.

I would also like to consider three more tools that will allow you to create new shapes.
The first of them is extremely trivial, but very useful - this is the scissors tool.
Let's say you have a shape and you want to cut it. Of course, you can cut shapes using the Shape Builder Tool, but this method is not always the most practical and convenient.
Sometimes it is more convenient to take the scissors tool (hotkey С), hover over any section of the shape, click on the outline of this shape - this is an important point. Then hover the cursor over another section of the shape outline, and also click on it, after which you can split the cut shape.
But there is one nuance here – in one part of the figure, one of its sides is not closed, it is simply missing. This will be clearly visible if you switch to Outline (Ctrl-Y) mode. The same the same with the other part.
To close the shape, you can select the pen tool.
Using the pen, draw a simple line from one anchor point of the shape to another. Click once on the anchor point, drag the line and finish creating this line at the second anchor point. This will close the object.
In addition, you have an even faster tool for dividing objects, and this tool is the knife.
Select it, draw across the object, then select the object and use the keyboard shortcut Ctrl Shift-G to ungroup the cut elements.
And the last tool that you may find useful for creating objects, illustrations and even logos is the grid tool.
Let's select it and stretch the grid along the artboard.
To fix it, press the keyboard shortcut Ctrl-2. This way you won't accidentally move it or delete it. Then you can choose any other color and of this grid, start drawing some form.
In fact, this is a very convenient tool, later you will use it to create an isometric illustration and a logo.
In the next article we will look at what a clipping mask is in Adobe Illustrator