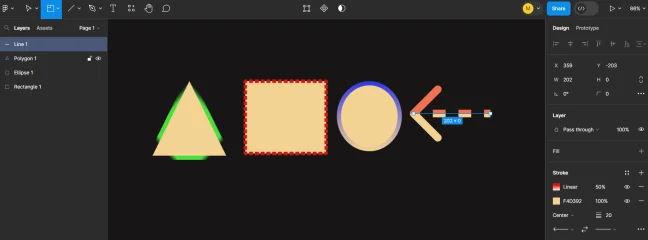
Outlining in Figma
In addition to the fill itself, we can also apply a stroke to any shape in Figma.
To add a stroke to a shape, in "Stroke", on the right, click on "+". By default, a black stroke will appear.
Stroke works according to the same logic as fill. That is, you can add "+" several fill layers of the stroke color itself and change the color settings of each of these layers.
You can also copy color settings and apply them to any other shape.
You can apply color styles to the stroke that we have in the document (the icon with four dots), but we'll talk about that in a separate lesson (Creating Styles in Figma)

By default, the stroke is created with a thickness of 1 pixel and is internal. In the settings, we can adjust its thickness and how it will outline the figure:
- Inside - internal
- Outside - external
- Center - centered
As for the fill of the stroke itself, again, in addition to the fact that we can change the color, we can apply a gradient to the stroke:
- Linear gradient (Linear)
- Radial (Radial)
- Angular (Angular)
- Diamond (Diamond)
You can also use any picture that you have on your PC.
In the additional menu "...", you can customize the stroke: change the rounding angle of the stroke itself or make it cut off. Customize the dotted line, dotted line pattern, etc.
