Rectangle and oval in Figma
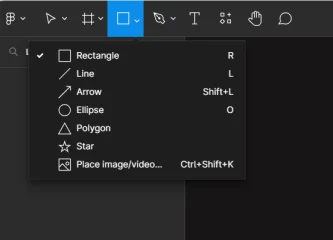
The "square" icon contains a group of the simplest shapes:

Now we will get to know the rectangle and oval better.
So, we select the rectangle and holding down the left mouse button, we stretch it. If we hold down Ctrl, then we will stretch a square.
Almost all the functions and capabilities of working with a rectangle are duplicated for other shapes, be it an oval, a star, etc. Therefore, the bulk of information will be directed to the rectangle.
If you hold down Ctrl and scroll the mouse wheel, the visibility of our rectangle will either increase or decrease.
When we zoom in, when hovering, control points appear. These points are responsible for the rounding angles of our rectangle. If you drag one of them, they will all be rounded equally.
If you hold down Alt and drag one, only one side will be rounded.

Let's look at the inspector. Here we see the coordinates of our object in the first line. These are the coordinates where exactly on the working field our object is located along the coordinate axis.
If suddenly we entered the wrong coordinates for it and now we can't find it, then just double-click on its icon on the left and it will appear in the center of the screen.
The coordinate points are counted from the upper left corner.
The second line is the dimensions of our rectangle: width and height. Here we also have a paper clip that connects the height with the width. If we click on it and then change the width, the height will automatically become the same.
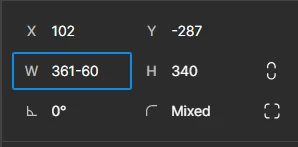
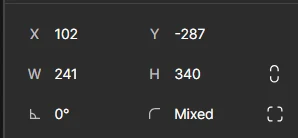
We can also change the size of an object using mathematical operations: addition, subtraction, division or multiplication. For example, if we subtract 60 from the width of our rectangle, we get 241:


This feature works with all numeric fields inside Figma.
The third line is the rotation angle of the figure itself. If you hover over it in the inspector, and then, when the arrow appears, drag with the left mouse button pressed, the figure will rotate. If you hold down Shift, the rotation step will be equal to 15 degrees.
Next to the rotation angle is the rounding angle, here we see how many degrees a particular angle is rounded.
Now let's get acquainted with the oval. If you simply create it, you get an oval, if you hold down Shift, you get a circle.
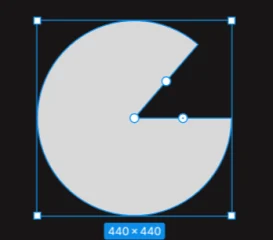
Here, when you hover, a control point also appears, but there is only one. Once you move it, the circle turns into a "pizza without one slice".
 Now there are two more additional points.
One of them is responsible for the angle of rotation of the figure itself inside the shape. And the central one is for the cutout in the figure itself:
 Thanks to this function, we can create a lot of interesting figures in the process of work.
