
Working with an artboard, scaling and exporting to Adobe Illustrator
Let's take a look at the workspace in Adobe Illustrator.
The first thing you need to know is that Adobe Illustrator has a work area or
Workspace (a large gray square).
You can place artboards and objects on it.
You can place objects not only within the workspace but also outside it. But keep in mind that when scaling, Adobe Illustrator will still hover over the workspace. That is, all this space outside the workspace can be considered conditionally functional.
Placing objects outside the work area is inconvenient and impractical, so you need to work on the artboard and within this gray square.
Also in Adobe Illustrator there is a presentation mode.
To activate it, press the F key. When you press it once, notice the change in the interface. Press it again - you will get a full-fledged presentation mode.
To return to the standard mode, just press the F key again.
In presentation mode, you can also control the scale and move around the
illustrator workspace.
Let's look at the artboard, the artboard. We can place any objects on the artboard.
If you select the Artboard Tool or hold down the Shift-O key combination, you will get access to editing the artboard in real time.
You can change its size and proportions, move it, copy it by holding down the Alt key.
Please note that if there are objects on the artboard during copying, they will also be copied along with the artboard.
In addition, artboards can be deleted, with the exception of the last and only artboard. In addition to intuitive editing, its dimensions can also be changed in the dynamic panel in the cells.
There is a lock here - this is the width-to-height binding. If it is active, then when
changing, for example, the width, the height will also change proportionally.
If you disable it, then both the width and height can be adjusted individually.
Now let's look at the layers. (Layers).
Layers can be found in the menu on the right, but if you do not have this palette, press F7.
So, open the layers and for now you will have only one layer.
By clicking Create New Layer you can create new layers. You can also change their places (by dragging them), delete them and lock them (by clicking on the lock to the right of the "eye", after which all objects on this layer will become inaccessible for any manipulation).
This is a very convenient function when you have an object that you would not like to accidentally move, deform or delete.
You can also make layers invisible.
If you click on the arrow, the image below
then the objects placed on this layer will open.
They can also be moved, deleted, blocked, made invisible by clicking on the eye, and you can also create a saber or sublayer.
Many manipulations with layers will be identical for both objects and secondary layers.
Why do we need layers?
Let's start with the fact that each object in Adobe Illustrator, if it is a vector object, is a kind of separate layer. Even the simplest object, be it a circle or a rectangle.
Layers are needed for convenient distribution of these very objects.
When you have a complex drawing, sometimes it is very convenient to break it down into elements, which in turn will be located on different layers.
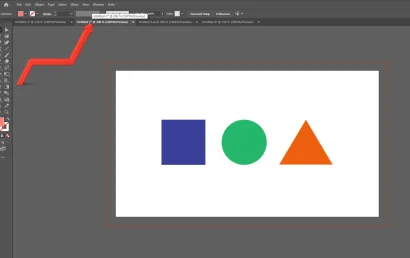
A very convenient function is Object Locate. Let's say you have an object on the artboard, and you want to find it in the list of objects.
To do this, select the object and click on the "magnifying glass", after which the selected
object will begin to be highlighted with a blue stripe.
But in addition to this stripe, if you select any object, a blue mark will appear next to it. Adobe Illustrator for convenience has provided as many as two indicators so that you can easily identify our object.
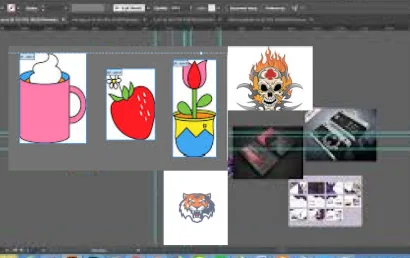
Now let's look at the objects that are located on layers.
We can call an object both a complete work of art consisting of
many primitives, and each individual primitive.
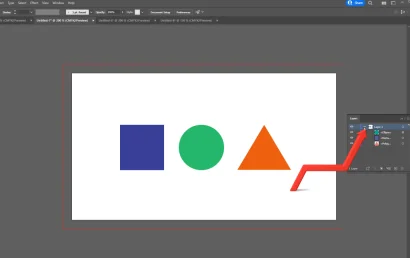
Let's create two more layers.
On the first layer we'll place a circle, on the second a rectangle, on the third a
triangle.
Despite the fact that the objects are distributed across layers, we can still select them all and work with them as if there were no layers. This is the beauty of layers in Adobe Illustrator.
They seem to be useful, but often you can do without them. Therefore, the most valuable thing a layer in Illustrator can give is a clear and convenient division and
distribution of objects in a complex drawing, layout or sketch.
Scaling the interface.
There are several ways to scale. Let's say we have a certain number of objects and the artboards they are located on.
If you just need to get closer to them, press the key combination Ctrl+,
or Ctrl- for inverse scaling.
If you need to get closer to a specific object, use the ZoomTool tool, by clicking on any area, you will start to zoom in to it. By holding down Alt, the plus sign will change to minus, and you will start to zoom out, it all depends on which part of the workspace you start clicking with the mouse.
An even more convenient way is to use the mouse wheel. Hold down Alt,
scroll the mouse wheel and move closer to the part where our cursor is.
We will move away along the same trajectory as we moved closer.
Select the scale, and within this scale you need to somehow move around the
workspace. To do this, select the HandTool tool, hold down the
left mouse button, as if hooking the workspace, and then move the mouse.
To avoid using the HandTool tool every time, just hold down the space bar.
The most convenient way to change the scale is to scroll the mouse wheel while holding down the Alt key, and moving around the workspace will be most convenient with the space bar held down.
Now let's save our .ai file. Immediately pay attention to this tab:
Here is the name of our file, as well as other parameters, but now we are only interested in the asterisk depicted here.
This asterisk means that the file is not saved.
To save it, press the key combination Ctrl Shift S, or go to File, Save As and select the folder where we will save, name the file somehow and select
its extension.
All extensions support vector graphics. Click Save. Here, do not touch any settings yet and just click OK.
Saved.
To quickly save, or rather re-save the current file, use the key combination Ctrl S.
The computer can glitch, the power can be cut off, so save your files as often as possible.
Now let's save our document in a raster format, for example
JPEG or PNG.
To do this, hold down the Ctrl Alt Shift S key combination, or go to File,
Export, Save for Web.
Here we can choose the JPEG, PNG or GIF formats.
If you choose PNG, then choose PNG24.
For example, let's save it now in JPEG. Select the maximum quality. Blur, that is, blurring is always 0%. Leave the Made parameter unchanged.
Next comes the size of our document. Here we can change its width and height proportionally or separately, and you can also change the size as a percentage.
By increasing this value, your width and height will increase accordingly. On the right, you will see a checkbox Clip to Artboard.
If you remove it, the artboard will be trimmed to the size of your object. And in the tab, be sure to select Art Optimized to smooth the edges of the object. Next, just click the Save button and choose where you will save your file.
In the next article we will master the tools for creating primitives and simple objects in Adobe Illustrator.