How to Understand Topology in 3D Modeling
Understanding topology in 3D modeling involves analyzing the distribution of faces in a model. You may have asked yourself questions like:
- How do I know if my model has the right edge distribution?
- Are the edges evenly distributed across my mesh?
- How do I know if my mesh is clean?
- Are there any pinching issues in my model?
- Why does my mesh look warped after subdivision?
Understanding the basics of topology in 3D modeling can help answer these questions. However, there are no universal rules or processes that can be applied to all projects. Despite this, there are simple rules to remember. However, it will take practice and experience to be able to apply these rules to different meshes.
Where to start?
So let's start by defining what proper topology is in 3D modeling.
Let me first show you some examples where topology becomes problematic, and then we'll look at a possible simple solution to this problem.
In the following example, we can see that the mesh is having some problems due to improper topology. One of the problems is the distortion of the area caused by the edges being too close together.
Now let's see if we can find a simple solution to this problem.
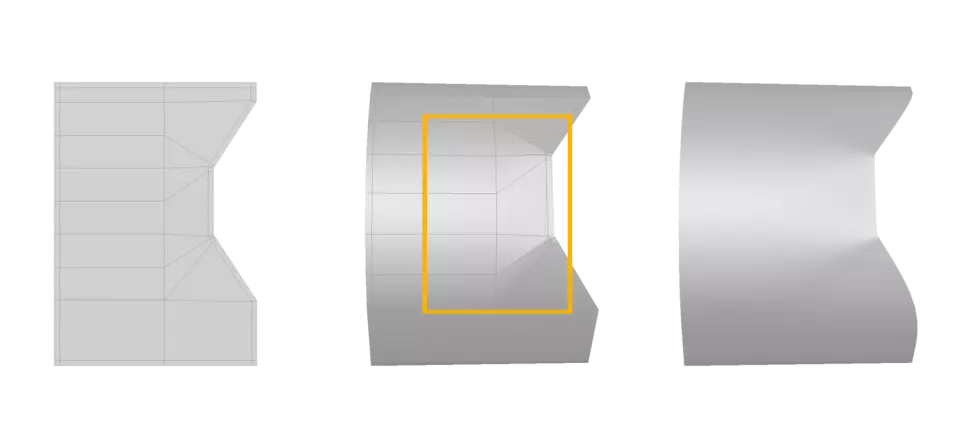
In this example, there is distortion in the mesh of the model. The sharpness of the region depends on the distance between its edges - the closer the edges are, the sharper the angle they form. However, if the edges are very close at one end and widely spaced at the other, deformation can occur.
In the example, you can see that the region with a wide spread of edges gradually transitions to an area with a narrow spread of edges. The transition between these regions causes deformation due to insufficient geometry to support such a structure.
A simple solution to this problem is to create a more uniform distribution of faces (or edges) in the model. When adding new faces, make sure that the distribution of faces is uniform and resembles squares or diamonds. This will help relieve stress and prevent deformation.
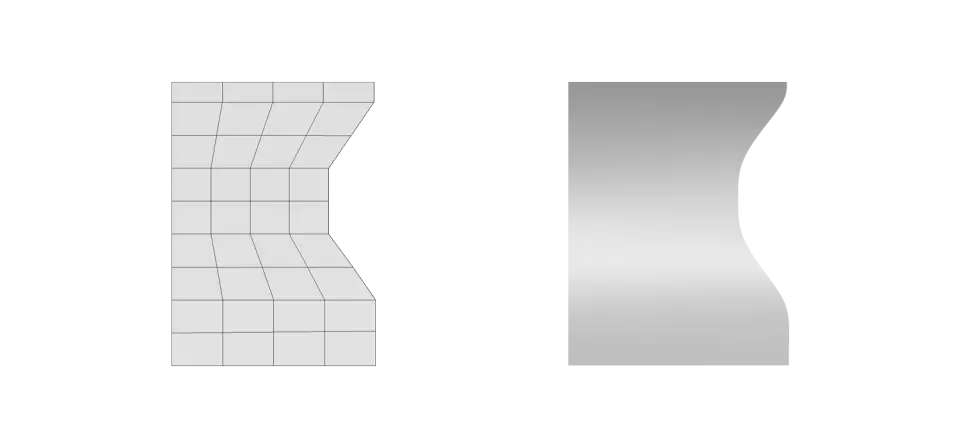
Proper topology requires not only a uniform distribution of faces, but also a sufficient polygon count to provide the detail in the model.
A polygon count that is too low can lead to distortion as detail increases. However, you should not overload the model with too many polygons, as this can also cause problems.
Working with faces has its pros and cons at both low and high polygon densities. Let's look at their advantages and disadvantages.
Low poly count
➕ Low poly count will allow us to easily change the shape and block out the idea.
⛔ With low poly count, we won't be able to create detail. The more detail we want, the more geometry we'll need.High poly count
➕ With a high poly count, we can easily add more detail and easily compact the mesh.
⛔ On the other hand, meshes with a high poly count are harder to control since they have more points and edges to manipulate.
The rules we've been following so far
So if we summarize this information, what conclusion or rule do we apply to our workflow?
1. We should start with a very low poly count.
Why? Because the mesh is easier to control and helps us create the shape faster.
2. We should make sure the edges are evenly distributed.
Why? Because we want to make sure we have enough geometry for our details and sharp corners. Uneven distribution of faces can lead to undesirable results, as we saw in our first example.
Great! Two simple rules to start with. Not that hard to remember, right?
But is that all?
No... we have two more. If we check our progress now, what's our next step?
Our last example shows that the geometry is distortion-free thanks to evenly distributed faces, but now the corners are no longer sharp.
To do this correctly, we need to become familiar with supporting edges and edge flow. Let's take a closer look at this.
Supportive Edges
What are Supportive Edges?
Supportive edges simply ensure that the object stays sharp after subdivision.
Any edge/shape that we want to tighten needs at least one or two (recommended) supporting edges. Usually, this is the outline of our model. Two edges that are close to each other form a sharp angle. We just need to follow this rule.
So, in our example, where do we place the support edge? We already mentioned the outline, right?
In this case, we can either extrude the edges of the outline (shown in yellow) outwards, or duplicate the edge on the inside. This way we set a supporting edge.
After extruding the shape, the outline edge should ideally be surrounded by two supporting edges.
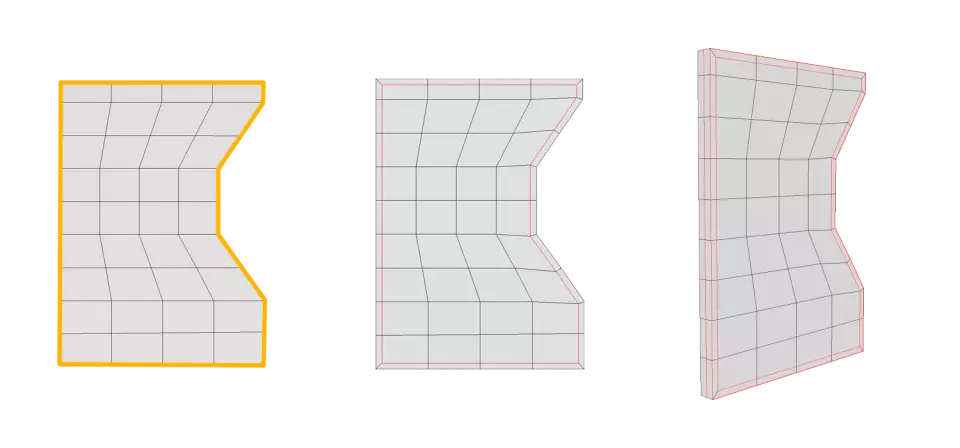
Now we can quickly check how our mesh will look with the subdivision applied. Everything looks fine, and there seems to be no distortion on the surface when bending. So far it looks pretty good.
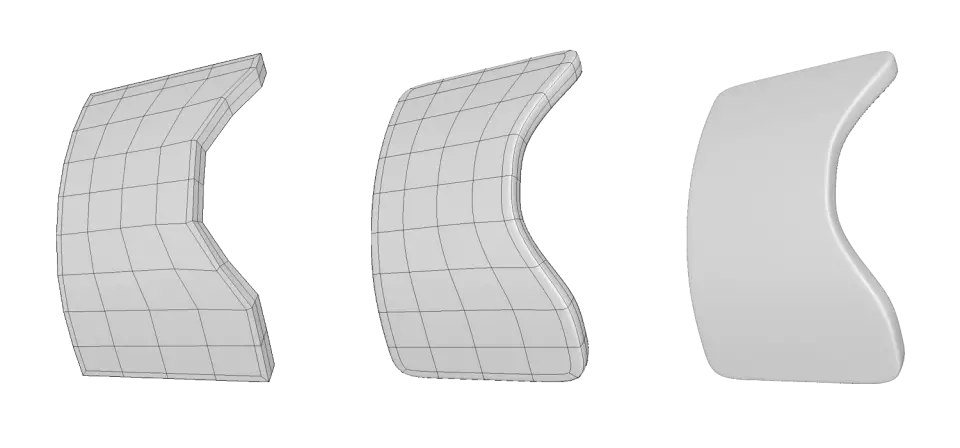
Let's add support edges to our list of rules too.
Rules we've been following so far
1. We should start with a very low polygon count.
Why? Because the mesh is easier to manage and helps us build up the shape faster.2. We should make sure the edges are evenly distributed.
Why? Because we want to make sure we have enough geometry for our details and sharp corners. Uneven distribution of edges can lead to undesirable results, as we saw in our first example.3. We need to add supporting edges.
Why? Because supporting edges will ensure that the structure of our main shape (or outline) is preserved when we subdivide.
Edge flow
What is edge flow and what is edge redirection?
In many situations, the first three steps do not always give the desired result. Some corners may not be as sharp or soft as we want.
In our case, all the corners are still very soft, not sharp and crisp.
Now we need a way to manipulate the topology we already have to get the result we want, right? But not only that, we also need to keep the topology clean while still keeping the squares.
If this area seems a little confusing, it just takes practice. The more examples you go through, the clearer it will be.
Let's talk about redirection first. We can start with the supporting edges, as they provide enough geometry to form a sharp corner.
If we go back to the very basics, we'll have two examples. One example will have a soft corner, and the other will have a sharper corner. Notice the difference?
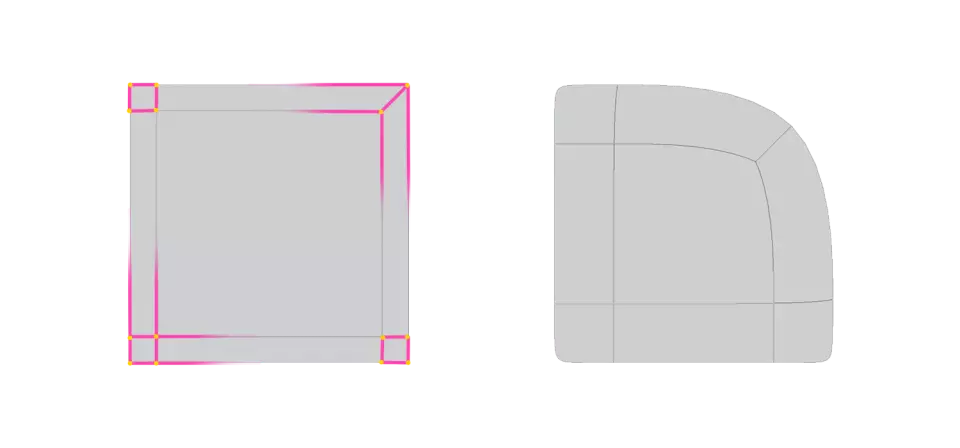
So, based on the example above, let's go ahead and apply sharp corners, using supporting edges where possible.
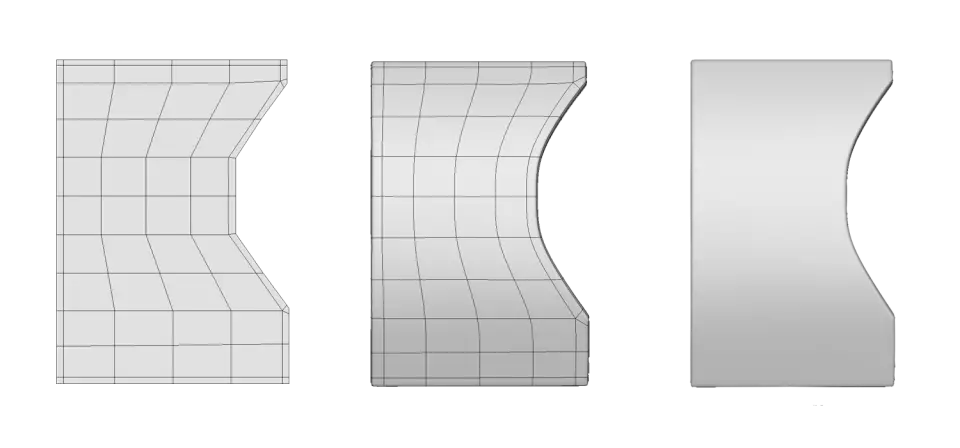
Now we're slowly getting closer to the final shape, and as you can see, there are only two corners left to sharpen.
Here's what we're going to do. We need to rearrange our edges so that they have a "gravity flow". Say, what???
Yeah, this thing helped me understand this edge thing better, so hopefully it will help someone else too.
In the example below, we see our current face flow on the left. But now let's check the example in the middle.
We have a gray outline that represents our supporting edge. Now let's also imagine that there is a gravity force there, and depending on what angle we go, there will be a flow for the face (shown in yellow). We just need to apply this logic to rearrange the faces so that they work in favor of the shape.
In the example on the right, I removed the edges we don't need so we have more space to follow the "gravity" of our shape.
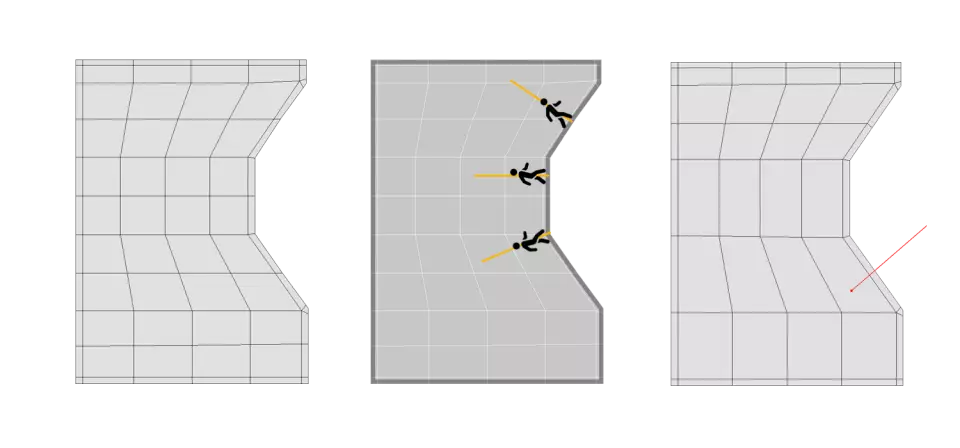
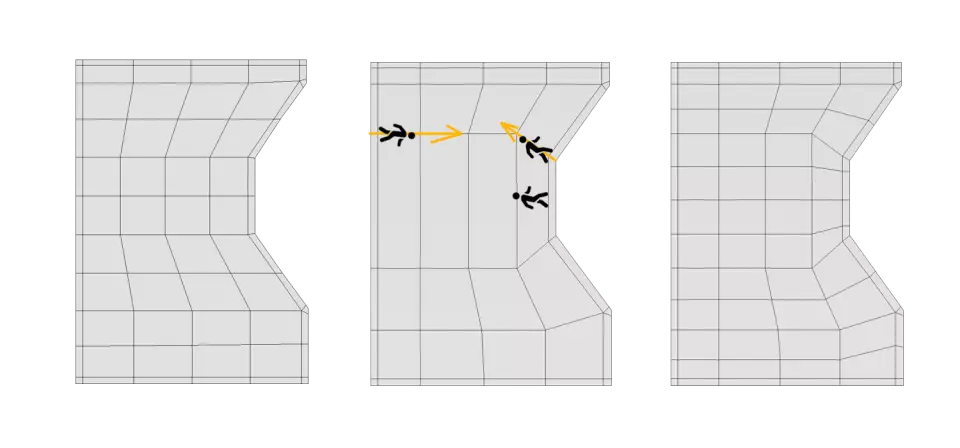
So, our original mesh is on the left. Then, as shown in the middle example, we'll remove the edges we don't need and arrange the flow of those that don't follow the "gravity" flow. Then, as shown in the right example, we'll return the edges to the middle areas so that all the edges are more or less evenly distributed again.
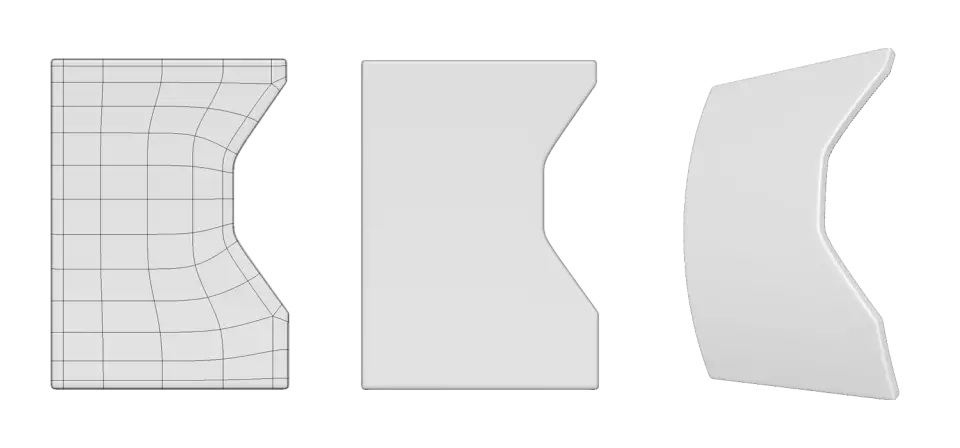
That's it, guys! There are a lot of other variations on how you can do this, but I tried to keep it simple and to the point.
Let's go over the rules again now that we're done.
- We should start with a very low polygon count.
Why? Because a mesh is easier to manage and helps us build up the shape faster.- We need to make sure the edges are evenly distributed.
Why? Because we want to make sure we have enough geometry for our details and sharp corners. Uneven edge distribution can lead to undesirable results, as we saw in our first example.- We need to add support edges.
Why? Because the supporting edges will ensure that the structure of our main shape (or outline) is preserved when we apply subdivision.- We need to check that the edges are distributed correctly.
Why? Because different face flows will give different results when subdivided. This part will take practice.
NOTE: While these rules may be simple, some factors may change. For example, supporting edges may be added later, after you have mastered the edge flow. But it is good practice to get familiar with the rules first, later these same rules can be easily broken and manipulated according to your working style.
