
Curves in Adobe Illustrator
In this lesson we will study the most fundamental tool not only of Adobe Illustrator, but also of any other graphic vector editor. Of course, we are talking about the Pen Tool and Bezier Curves.
Bezier curves are a type of curve that were discovered independently by Pierre Bezier of the Renault automobile company and Paul de Casteljau of the Citroën company.
This type of curves was named after Pierre Bezier, as he published his research earlier, although the discovery of these curves was made earlier by Paul de Casteljau.
The curves were first presented to the general public in 1962 by Pierre Bezier, who used them for computer-aided design of car bodies.
Subsequently, this discovery became one of the most important tools of computer-aided design systems and computer graphics programs.
For us, designers-illustrators, Bezier Curves are a universal tool for designing, layout and drawing. Even if you have a graphics tablet and a good hand, you should be able to use this tool.
So, let's start with the simplest.
With the Pen Tool, you can draw regular straight lines.
Select the pen from the tools menu or hold down the P key. As soon as you have a cursor with a small "star", you can start drawing.
Move the cursor to the place where you want to start drawing the curve. Left-click and release it. Move the cursor.
To draw a straight line, strictly horizontal, vertical, or with a 45-degree cutoff, hold down the Shift key.
As soon as you move the cursor to the desired distance, click the left mouse button again. After that, you will have a second anchor point, and with it a straight line.
Adobe Illustrator will offer to further construct the line. But if you want to finish everything, just press the Escape key.
To deselect an object, just hold down the Ctrl Shift A key combination, or switch to the "Selection" tool, hotkey V, and left-click on the artboard.
To draw a straight line at a free angle, you do not need to hold down the Shift key. Create straight lines at the angle you want.
Broken line.
Combine free line direction with horizontally and vertically directed ones.
If you want to create symmetrical pyramids, you need to draw lines at an angle of 45 degrees. To do this, hold down the Shift key and look at the quick pink guides.

Closed object.
To create a closed object, connect the first and last anchor points.
Anchor points are an integral and key part of any contour of an object or objects. By dragging at least one of the anchor points, you can radically change the plasticity or geometry of the object.
To select several anchor points at once, take the Direct Selection Tool and stretch a rectangular lasso. Having selected several reverse flows at once, hover over one of them and drag. The other selected anchor points will be dragged along with it.
You can also select them one by one while holding down the Shift key or use the Q key.
Curves.
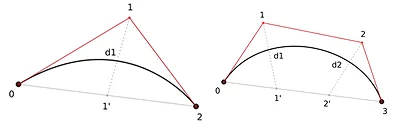
What will you do if you need to create a semicircle?
Most likely, you will create a circle, cut it with scissors, this will be a logical and correct solution. But if this semicircle has at least some plasticity, different from the plasticity of a standard semicircle, then this turns into a difficulty. In such a situation, you need to connect the pen.
When creating a curve with a pen, you can also connect the Shift key. Hold it down. Click the left mouse button and hold it. Holding down the left mouse button and the Shift key after clicking, start dragging the cursor up or down.
By stretching the manipulator, you will increase the range of the curve. The more you pull the manipulator, the more the guide will swing.
Now try to repeat the same action, but without the Shift key. Put the first op, hold down the left mouse button and move the cursor in any direction and at any angle. Release the left mouse button and move the cursor to the side.
What did you notice?
The guideline was created at a different angle.
Repeat the action, but this time pull the manipulator in a completely different direction. The guideline will go at a completely different angle.
The direction of the curve depends on the angle of the manipulator you pull.
If you want to get a symmetrical curve, the manipulators should be stretched to the same distance.
To change the direction of the curve, hold down the Ctrl key and grab the manipulator of the previous anchor point and pull it slightly to the side.
You can also adjust the curve's plasticity in Adobe Illustrator after the fact. You can draw it from start to finish, reset the guide, and even remove the selection, then select the anchor points one by one with the Direct Selection Tool and adjust the curve's plasticity with the manipulators.
Now let's look at creating a hybrid object, that is, an object consisting of both a smooth curve and straight lines with rough angles at the joints.
First, draw a smooth curve. Look at the guide that Adobe Illustrator offers. If you create a new anchor point, a new curve will appear, and you need to create a corner and draw a straight line from the corner.

To reset the guide and create a corner at a given point, you need to move the cursor to this point and click on it. After that, a corner will be created and you will be able to draw a straight guide.
Let's look at another way to create an angle.
If you hold down the manipulator, the Alt key and drag the manipulator, the manipulator's antenna can be bent at a certain angle.
Every time you create a new anchor point, a new manipulator will appear.
If some anchor point is unnecessary and interferes with the curve adjustment, you can left-click on it and press Delete.
In a situation where you made an unsuccessful swing, reduce it by holding down Ctrl and shorten the length of the manipulator.
Anchor Point Tool - bends straight lines.
Select the object, select the Anchor Point Tool (keyboard shortcut Shift C) and move the cursor over one of the straight lines. After the icon appears next to the cursor, hold down the left mouse button on the straight line and drag it, it will begin to bend.
This method of constructing flexible objects in Adobe Illustrator is not the most practical. It takes more time, and the result will require more detailed adjustments, but I just want you to know that this method also exists and can be used if necessary.